I LOVE RIBBON....I'm serious.....My Stash of ribbon was getting to be embarassing--ok it was embarassing a LONG time ago but now it's not quite as embarassing:) So, like I told you before, we moved into a new house! And since I know I'm decorating my girlies bedroom in Mary Engelbreit stuff I figured I could make some Bow holders for their bathroom(FINALLY! The girls bow stash is almost as bad as my ribbon stash) Hence--I got to use some of my fabulous ribbon and organize the girls bows with this awesome Canvas Bow Holder Tutorial Juliana and I came up with:)

-Ribbons and/or trims--all different sizes and in the color schemes you want. (Is it embarassing to admit that I didn't have to buy ANY ribbon to make my Bow Holders? Is it crazy that I had it all on hand? :)
-Canvas--Any size you like--My favorite sizes are 18x24 or 12x24 but really, any size works....In this tutorial I used the 18x24. Michael's Craft Store is a GREAT place to find canvases--they are always going on sale there, and they have tons of different sizes to choose from!
-Glue Gun and Hot Glue
-Scissors
-Staple Gun and Staples(optional)
-Chair Felt Pads--circular(optional)
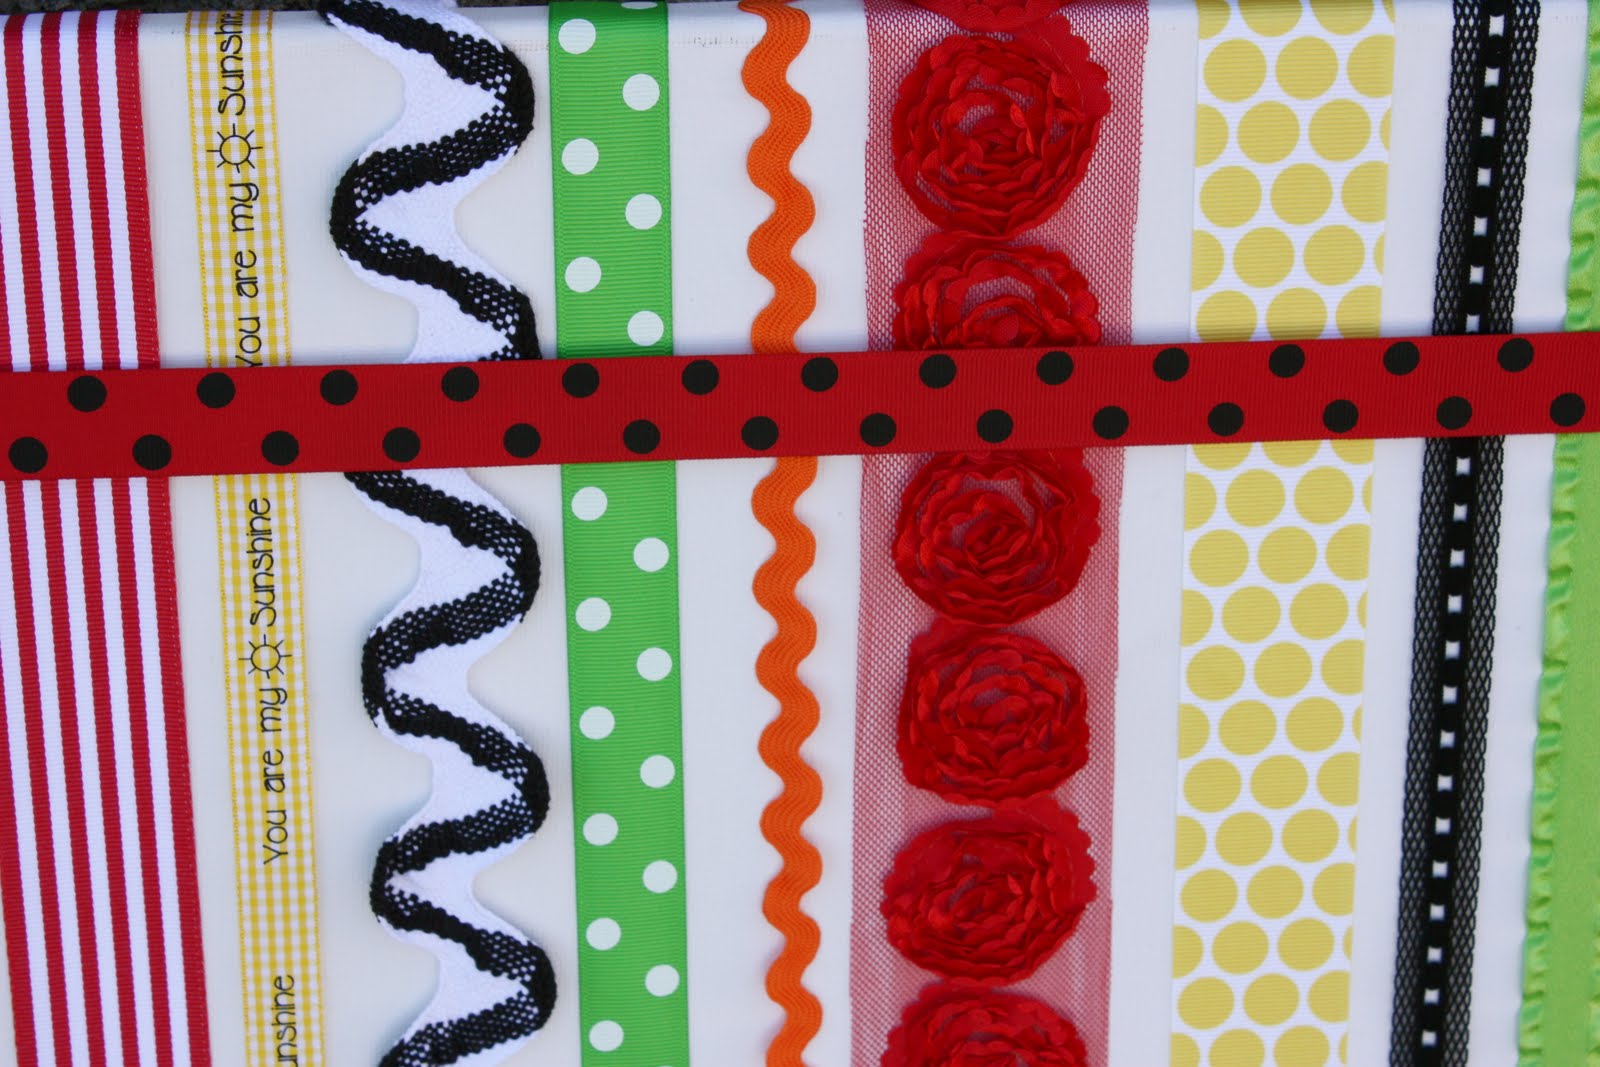
Step 1. Pick out the ribbon and trim you want to use. Lay it out on your canvas to give you an idea of what it will look like. You can use as much or as little ribbon as you like. I used 16 pieces of ribbon or trim for mine. :)

Step 2. Take it off the canvas and lay it out in order.

Step 3. One by one, lay the ribbon or trim on your canvas and fold it over the edge and glue it to the canvas on the back. The front of your canvas should now look like this:

The Back of your canvas should now look like this:


To give you a closer look:

Step 4. Optional: Use your staple gun and staple down each ribbon or trim on both sides. This isn't a NEED but it does make your ribbon more sturdy. I promise it isn't going to come off if you do this! 

Step 6. Optional: Add chair felt pads to the corners of your canvas so it doesn't rub against the wall.

Viola! You are done! Now go get all your bows and clip them onto the ribbons and trims! Cute, No?


Here's a pic with only the flower clips I have in the colors that match my Bow Holder:)


Here it is with all my Flower clips:) See, you can get a TON on there!


I actually made two coordinating bow holders because I have bows and flower clips--trying to be organized remember? It's fantastic because it organizes your bows and it's super cute as a decoration! (sorry for the yucky picture--the girls bathroom is seriously a cave--no natural light!) See, economical and darling!


Here are a few others that we have made for jujuB parties just to give you an idea of all the different combinations you could make!


0 comments:
Post a Comment